How to set up CLU & DEFA Power
Requirements
Please make sure these are fulfilled before you start:
- You can start the set up process when you have received information from DEFA that your CLU is ready
- The CLU and the DEFA Power needs to be on the same network
- DEFA Power needs to run 4.2.0
- You need to use DEFA Power setup app version 2.5.0 for the configuration process
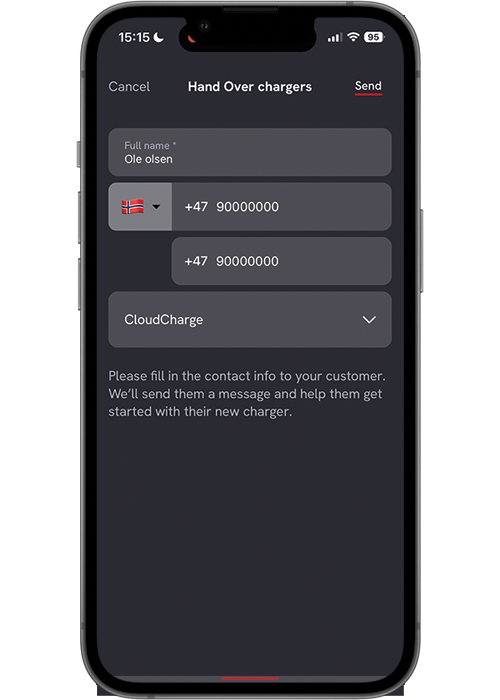
- For CLU & DEFA Power charge system, only CloudCharge shall be selected as Operator during the handover step
For more information: evsupport.no@defa.com
1
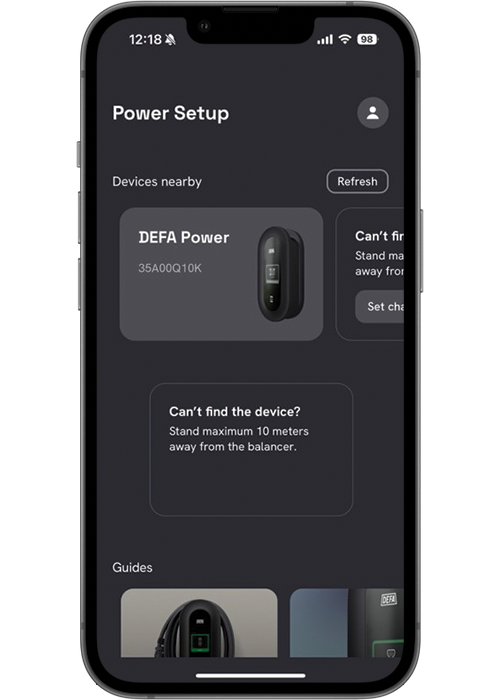
Connect to one charging station using Bluetooth and DEFA Power Setup app.
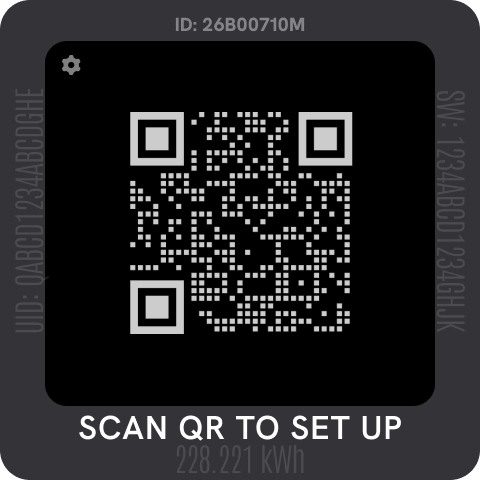
If you don’t have the app, download it, and scan the QR-code on the screen:
2
Connect to a charging station to set it up to the Wi-Fi network

3
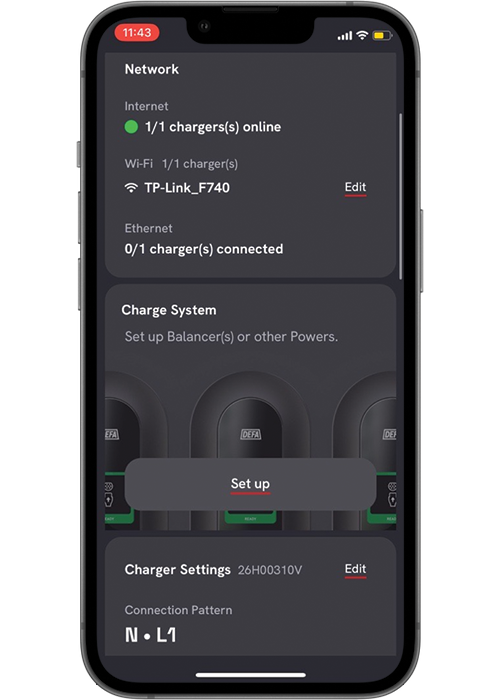
When connected to the charging station, select Set up Wi-Fi network
4
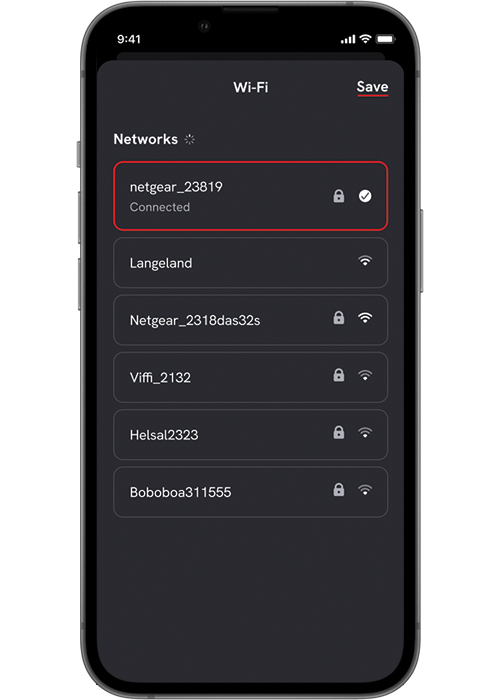
Select a Wi-Fi network and type in the password
5
Repeat the previous steps for each charging station in the charge system.

6
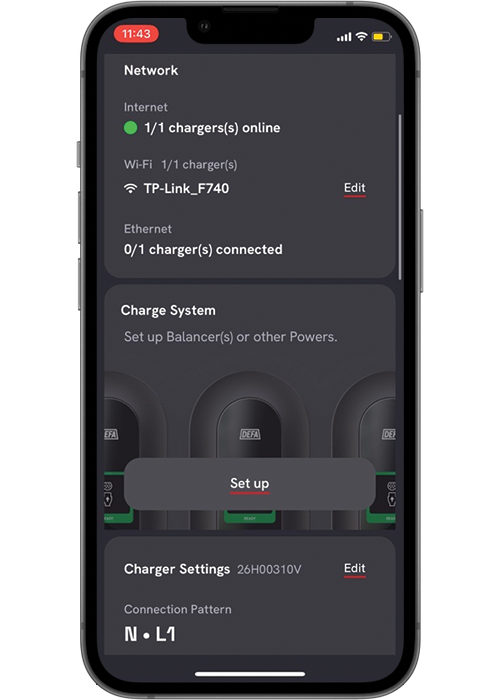
When all the chargers has been set up to the same network, connect to one of them via Bluetooth

7
Select «Set up» Charge System
8
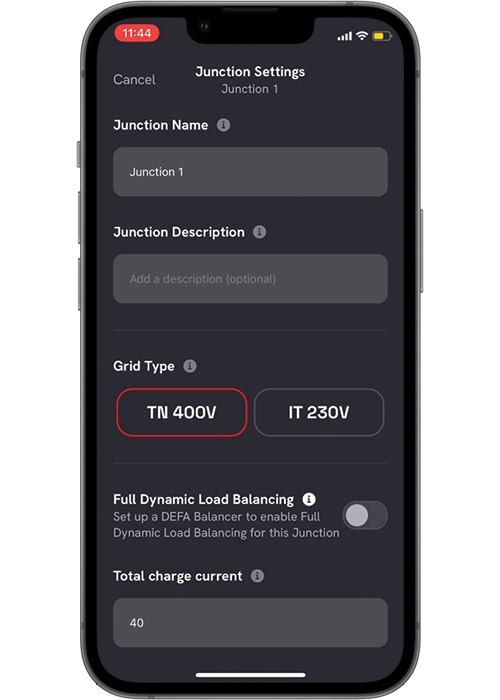
In the Junction Settings, add the junction information and select the Grid Type
9
Set the «Total Charge current»
Total Charge current: A fixed maximum amp value used for this group for load balancing.
The charging will not override this limit when multiple chargers and CLU are in use. This value could for example be the fuse size for this group.

10
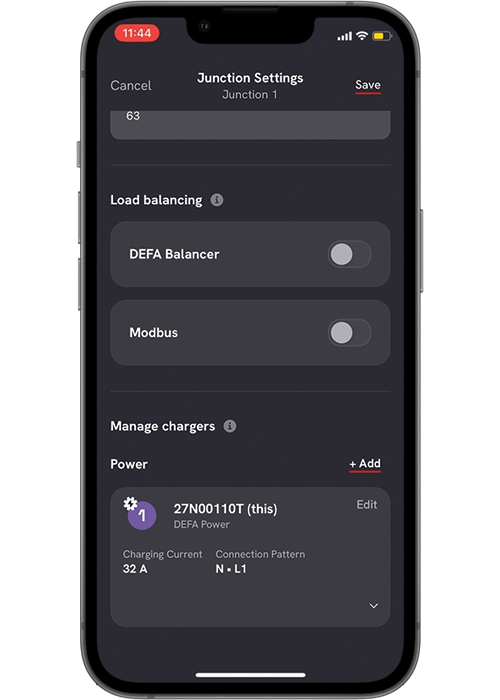
When the «Total charge current» is set, scroll down to «Manage Chargers»
11
Select «+Add» to add the chargers and/or the CLU to the charge system

12
Select the charger(s) and CLU you want to add

13
Select the charger(s) and CLU you want to add.
Then click Add in the top right.

14
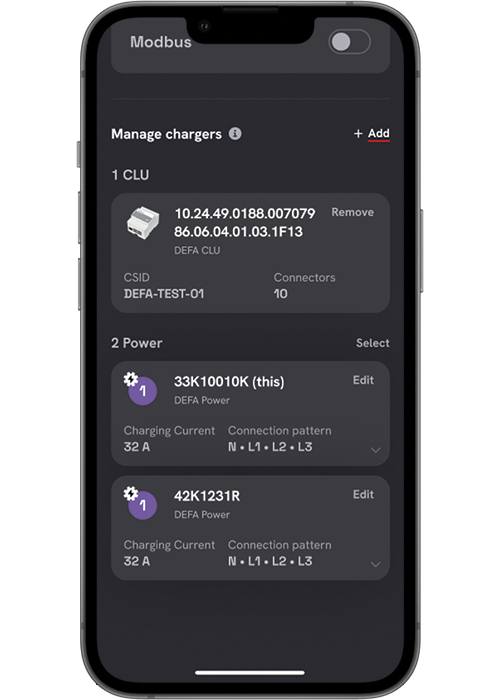
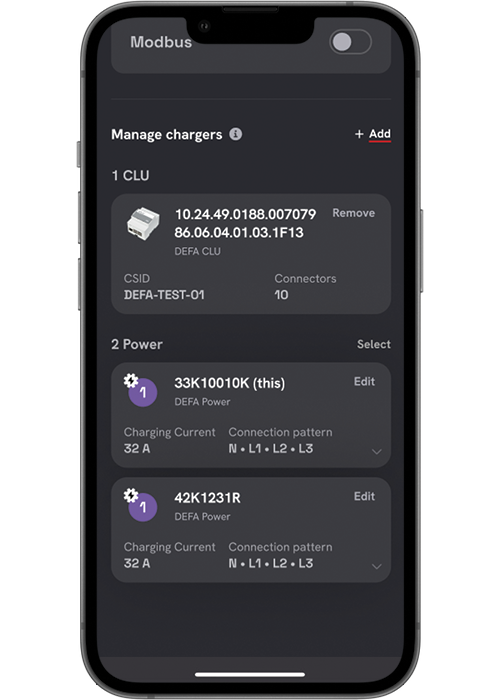
The charger(s) and CLU are now added to the Charge system
15
Choose select if multiple chargers settings needs to be changed or edit individually.

16
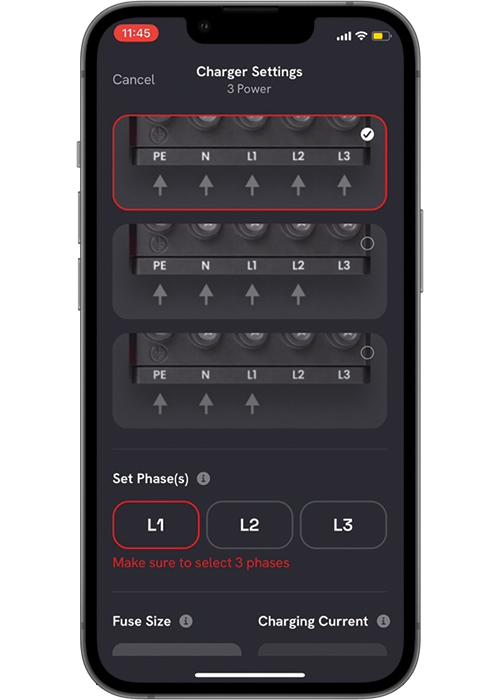
Select the Connection pattern on the wall bracket and the phases being used from the fuse box
17
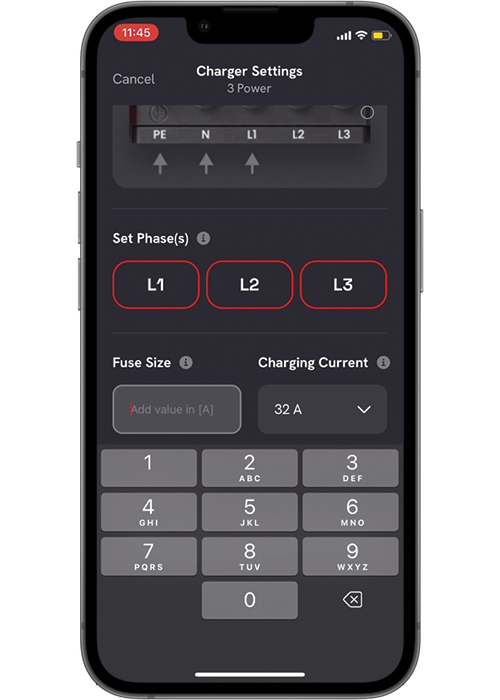
Set fuse size for the upstream fuse and the maximum charging current accordingly.
(Note! The internal fuse for DEFA Power S and Power Ready S is 32A)
Select «Save» in the top right when settings are set
18
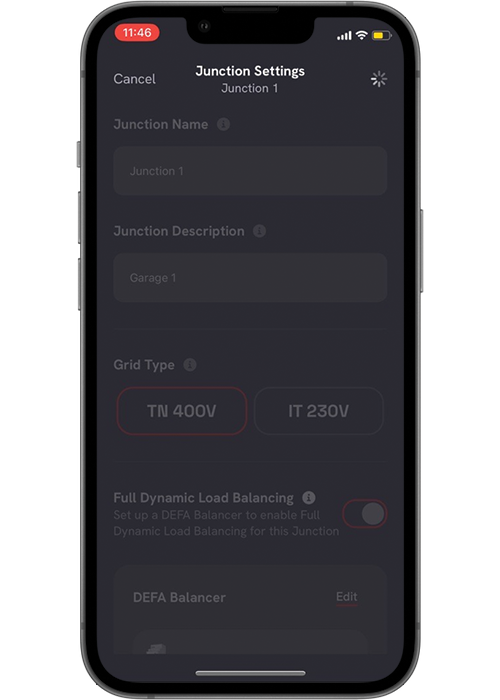
When all the settings are set, click «Save» in the top right in Junction Settings
19
All the settings will now be saved and shared with the chargers in the Charge System
20
The dashboard will be updated
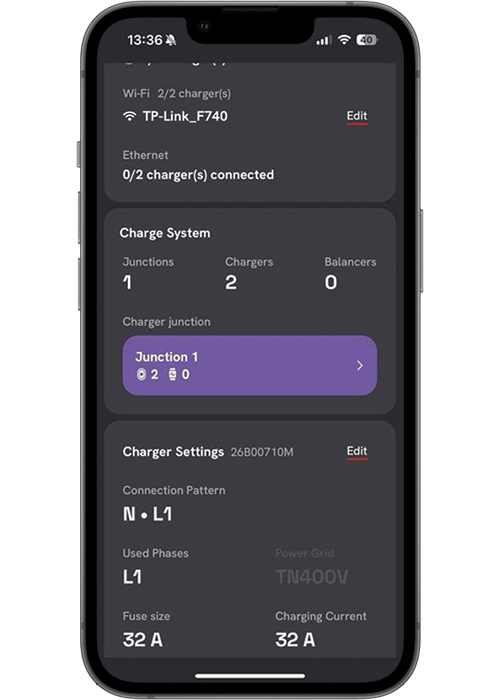
21
Scroll down to Test and Verify

22
Perform «Test and Verify»
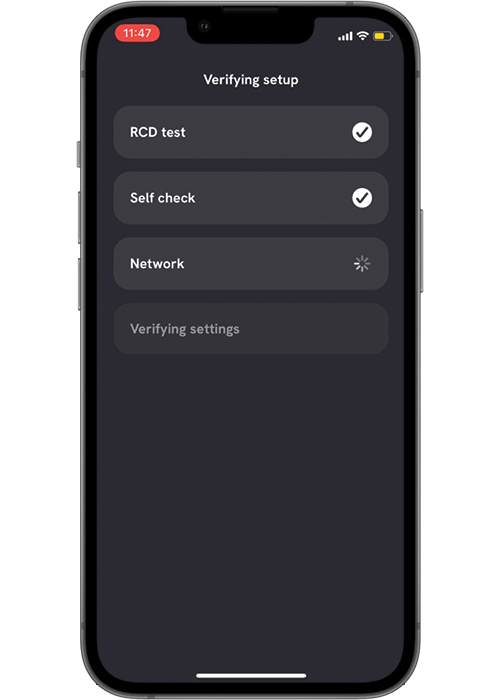
23
«Test and Verify» summary
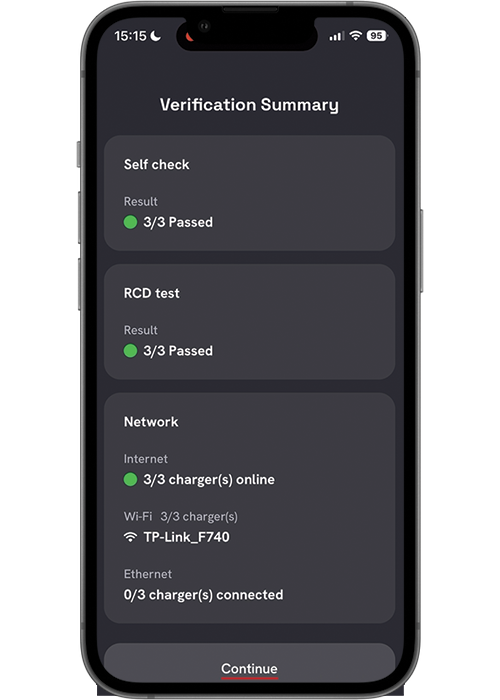
24
Scroll down to «Hand Over»
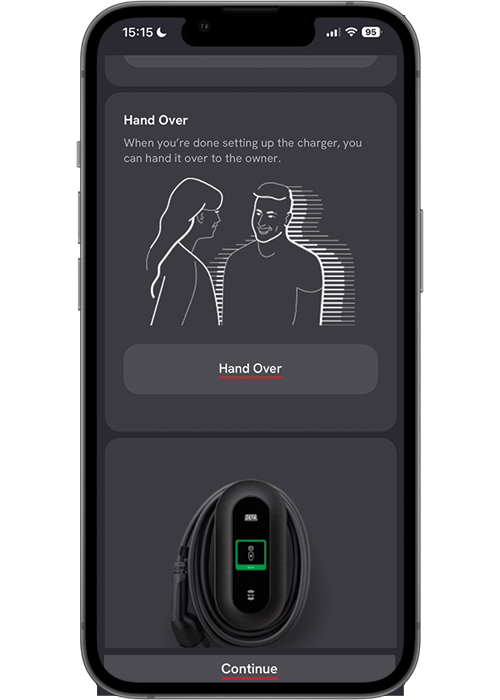
25
Perform «Hand Over chargers» to handover the installation to CloudCharge.
CloudCharge will automatically get the charge points into their system.
Note!
For CLU & DEFA Power charge system, only CloudCharge shall be selected as Operator. If wrong Operator is selected, please Re-Do the handover step and select ClouCharge
26
Scroll down to «Complete Setup»

27
Select Complete Setup to end the setup process.
The Charge system is now available in CloudCharge and shall be ready for use
To use the app, your charger must be connected to the Internet. If your charger appears Offline in the app, follow either the Wi-Fi guide, or the Cellular Connectivity guide to connect it to the Internet.
Published: November 12th, 2024

 Lighting