How to set up DEFA Power / DEFA Power S Charge system
1 Connect to charger
2 Set up network
3 Set up charge system
4 Test & verify
5 Handover
6 Complete setup
1
1.1 Connect to charger
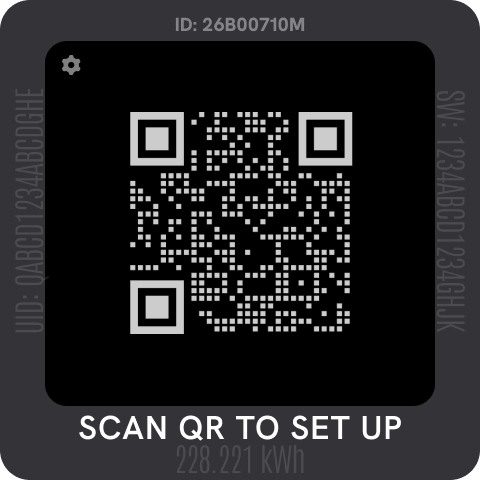
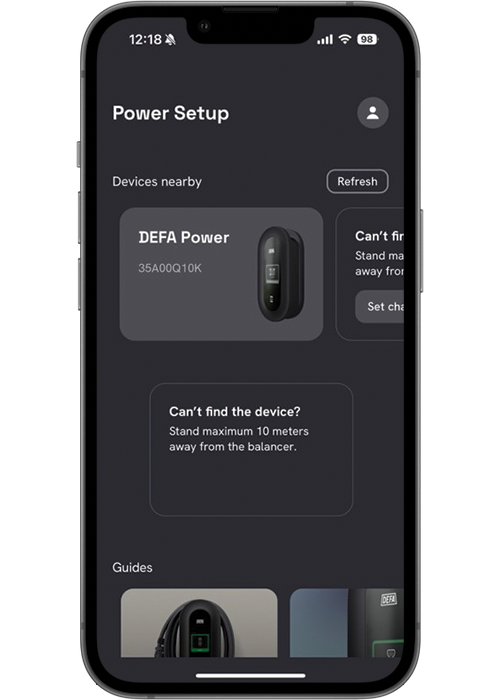
Connect to one charging station using Bluetooth and DEFA Power Setup app. If you don’t have the app downloaded, scan the QR-code on the screen:
2
2.1 Set up network
Connect to a charging station and set it up to
your Wi-Fi network. If the charging stations are
connected with ethernet cable, the network
steps can be skipped

2
2.2 Set up network
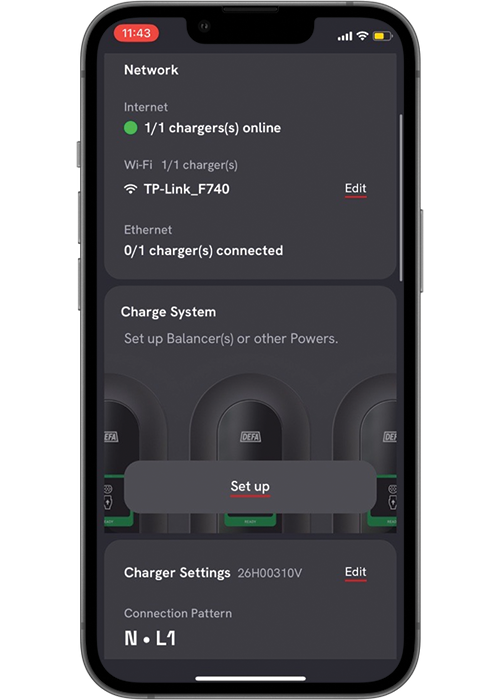
When connected to the charging station,
select «Set up» Wi-Fi network
2
2.3 Set up network
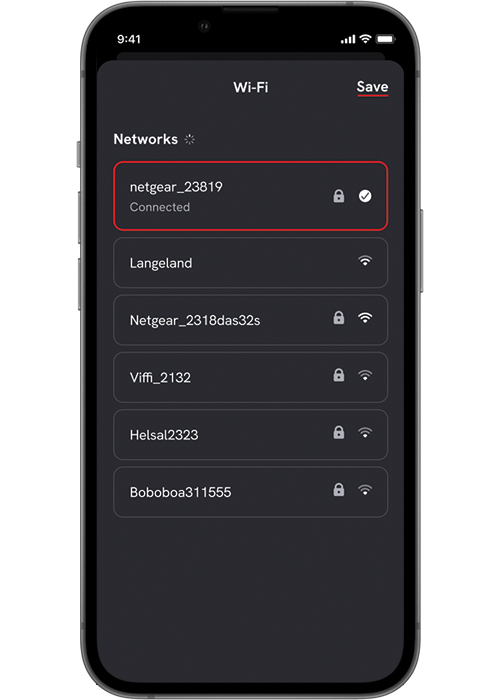
Select your Wi-Fi network from the list of
available networks and type in the password
2
2.4 Set up network
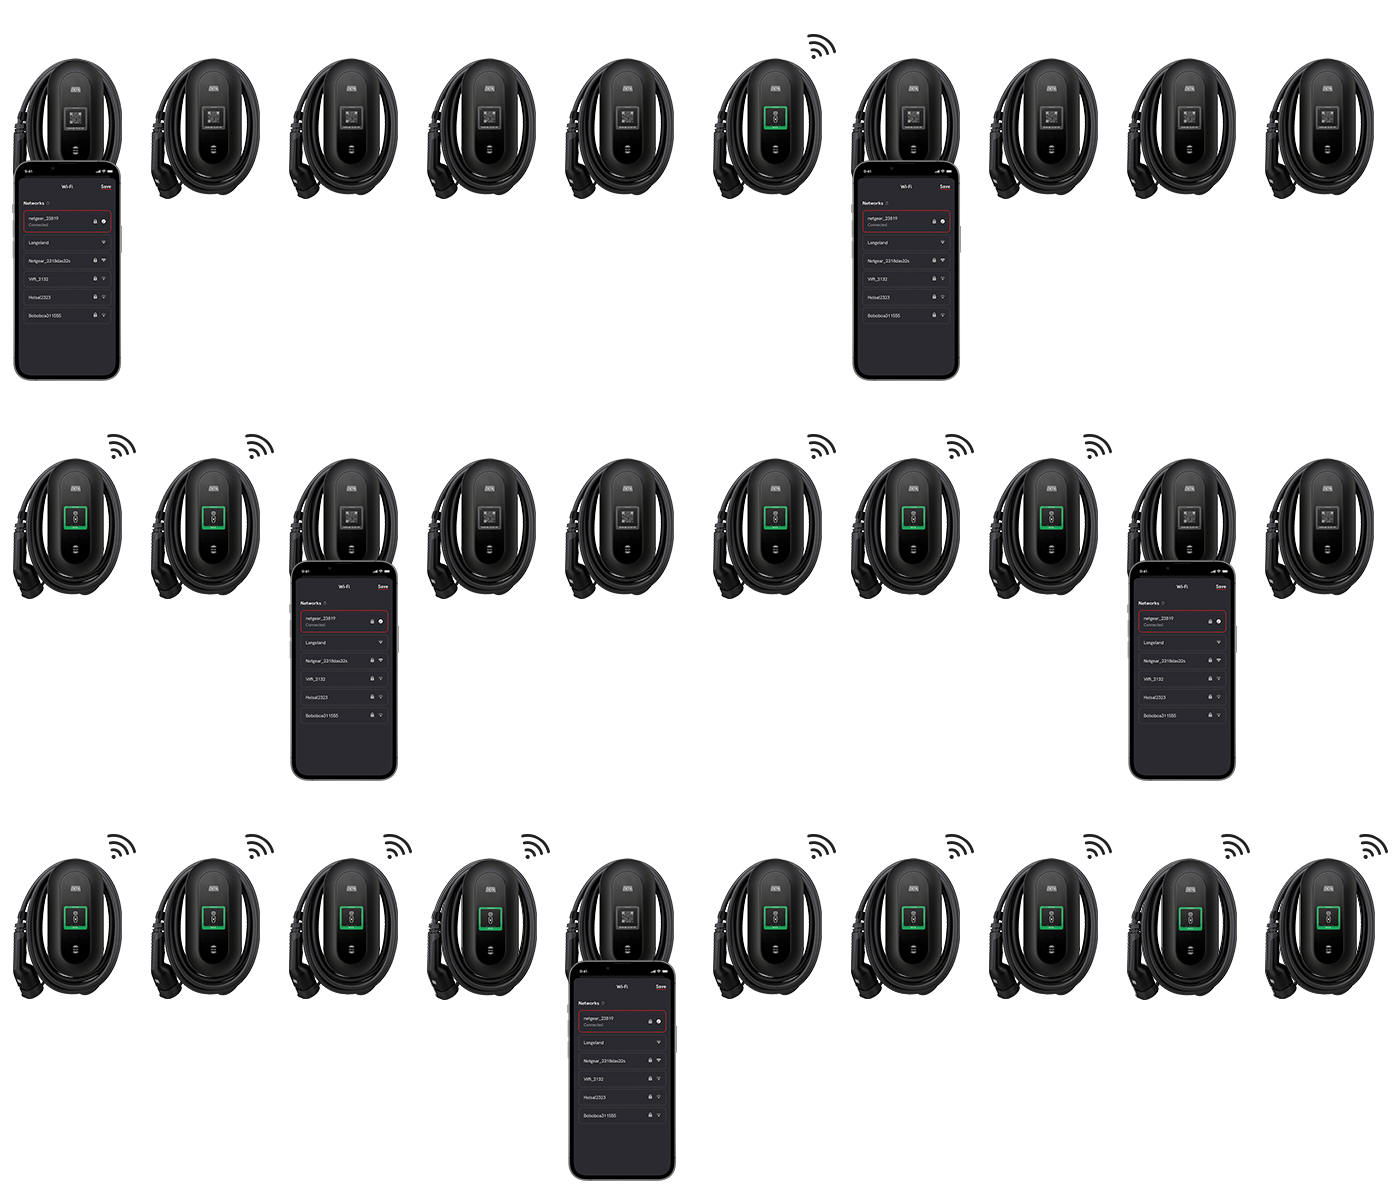
Repeat the previous steps for each charging
station in the Charge System.
When all the chargers has been set up to the same network,
connect to one of them with the Setup app

3
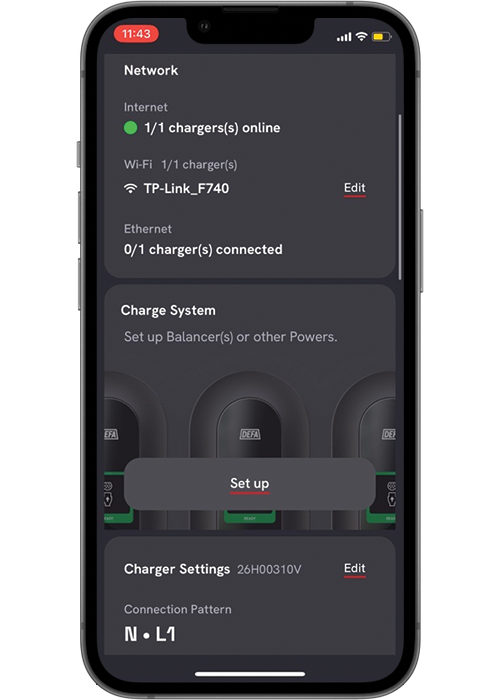
3.1 Set up charge system
Select «Set up» Charge System
3
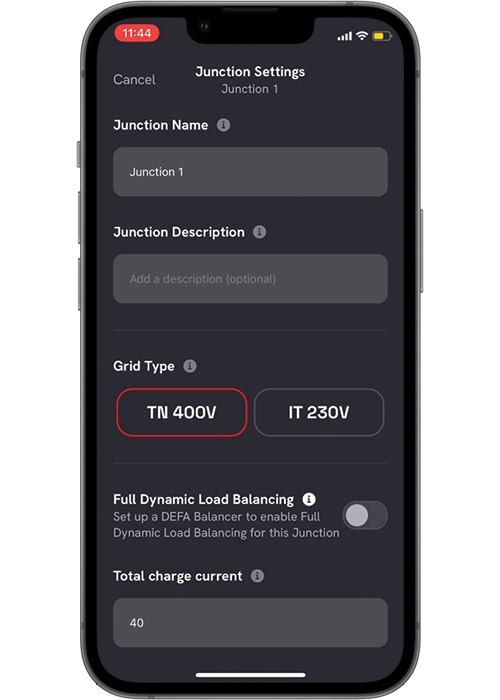
3.1.1 Junction Settings
In the Junction Settings, add the junction information and select the Grid Type.
Set the «Total charge current»
Total Charge current: a fixed maximum amp value used for this group for load balancing. The charging will not override this limit when multiple charger are in use.
3
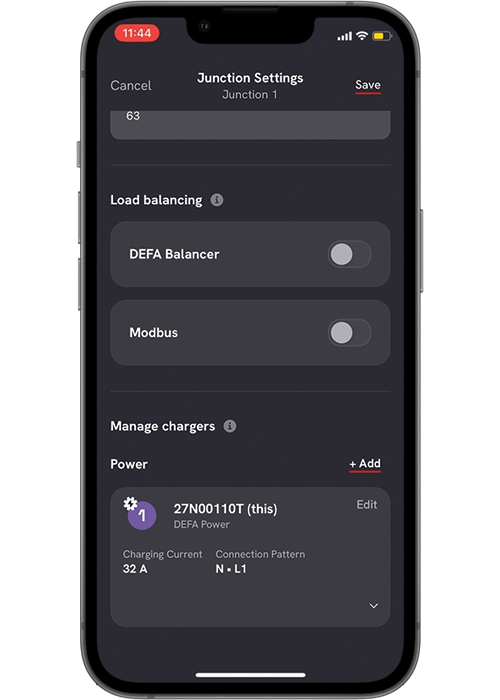
3.1.2 Junction Settings
When «Total charge current» is set, scroll down to «Manage chargers»
Select «+Add» to add the chargers to the Charge System
3
3.1.3 Junction Settings
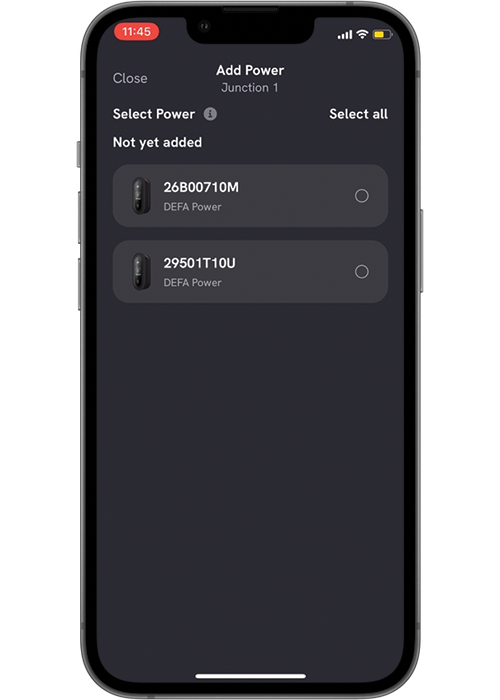
Select the charger(s) you want to add
3
3.1.4 Junction Settings
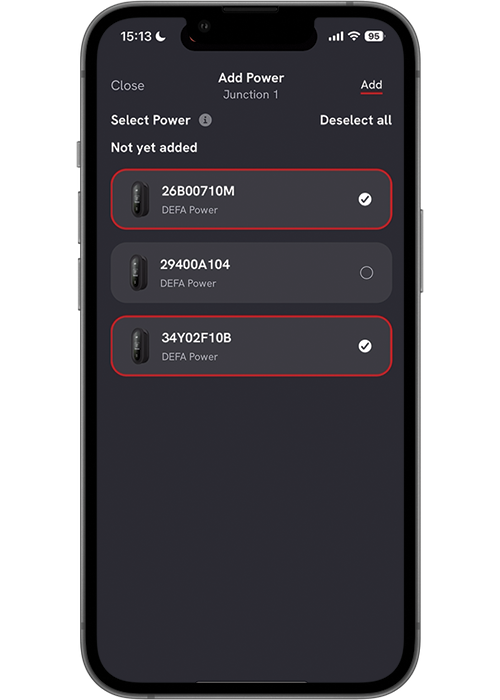
Select the charger(s) you want to add.
Then click «Add» in the top right
3
3.1.5 Junction Settings
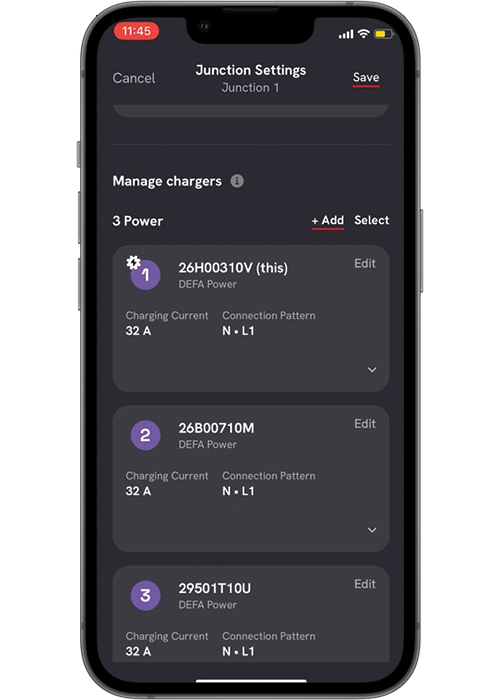
The charger(s) are now added to the Charge System
3
3.1.6 Junction Settings
Choose «Select» if multiple chargers settings need to be changed or edit individually.

3
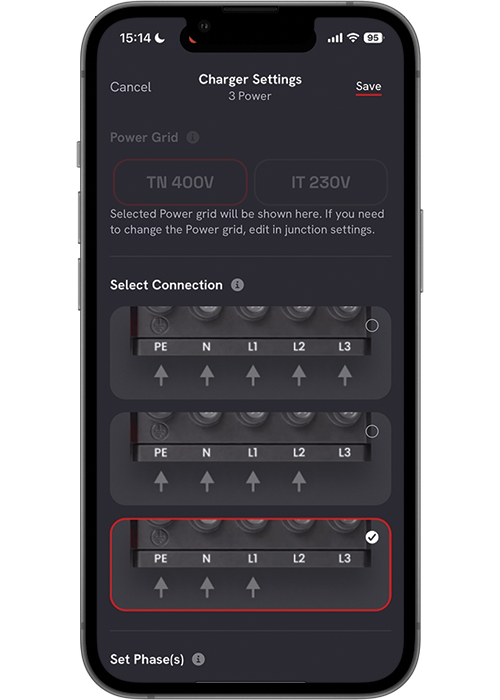
3.1.1.1 Charger Settings
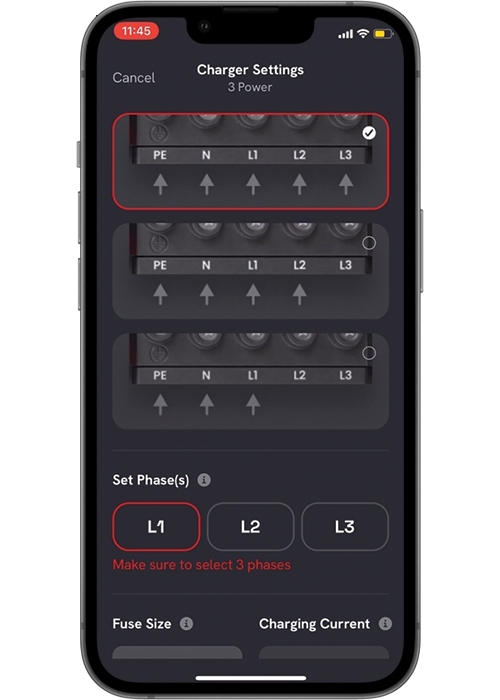
Select the Connection pattern on the wall bracket.
Set phases being used from the switch board.
3
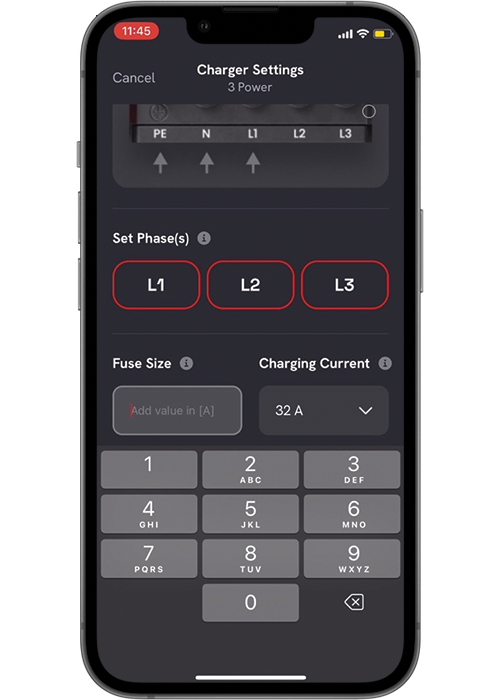
3.1.1.2 Charger Settings
Set the fuse size for upstream fuse for the charger.
Set maximum charging current accordingly.
Note! The internal fuse for DEFA Power S and Power Ready S is 32A
3
3.1.1.3 Charger Settings
Scroll upwards and select «Save» in the top right when settings are set.
You will now be guided to Junction Settings view.
3
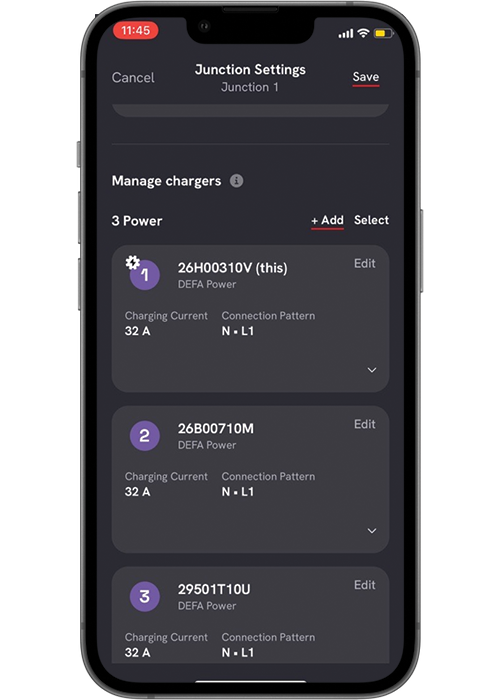
3.1.7 Junction Settings
When all the settings are set, click «Save» in the top right in Junction Settings
3
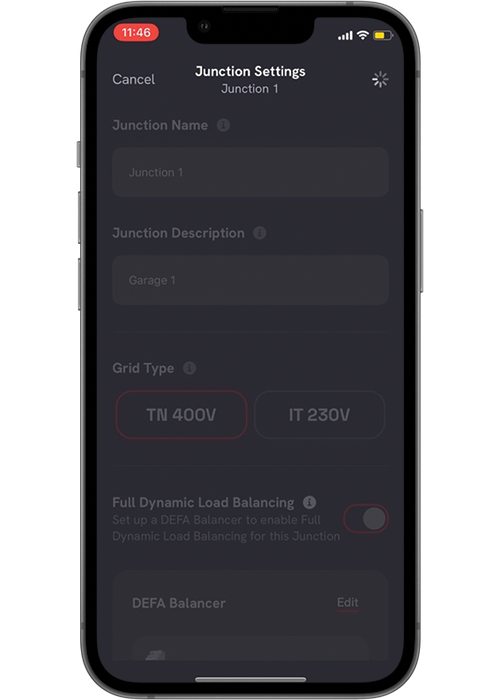
3.1.8 Junction Settings
All the settings will now be shared with the chargers in the Charge System.
You will see the loading screen while the configuration is being uploaded to all chargers:

3
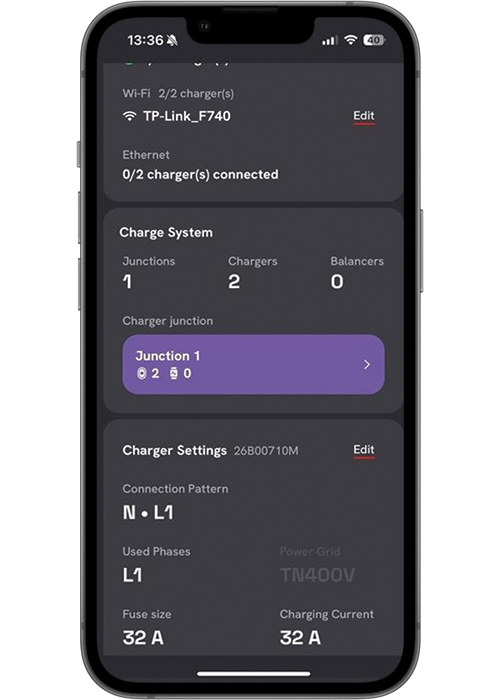
3.2 Dashboard
The dashboard will be updated with the settings and an overview of the Charge System
4
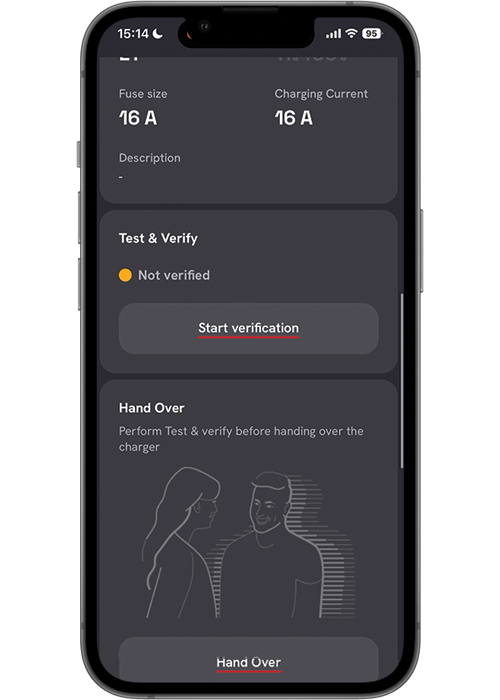
4.1 Test & Verify
Scroll down to «Test & Verify» and select «Start verification»
4
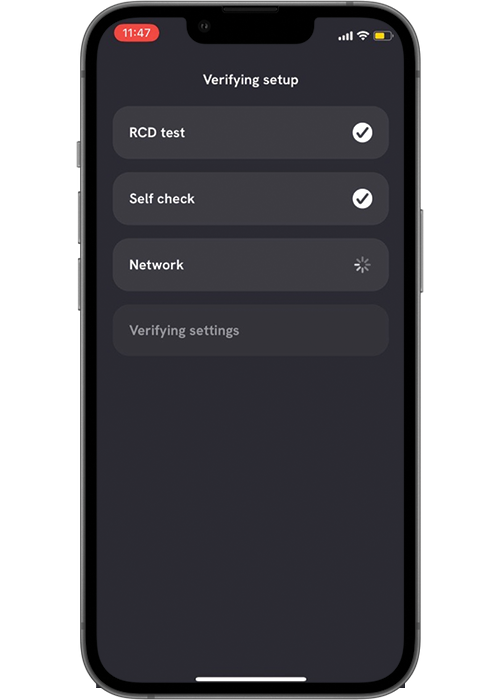
4.2 Test & Verify
«Test &Verify» ongoing
4
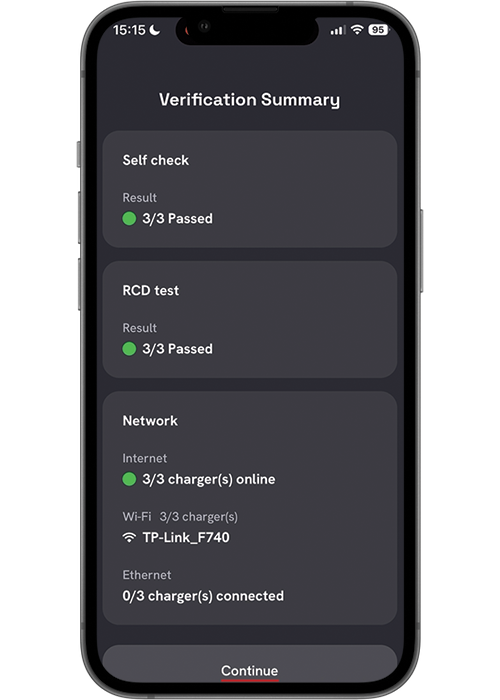
4.3 Test & Verify – Summary
Verification is completed and a summary will be presented. Select «Continue» to go back to the dashboard
5
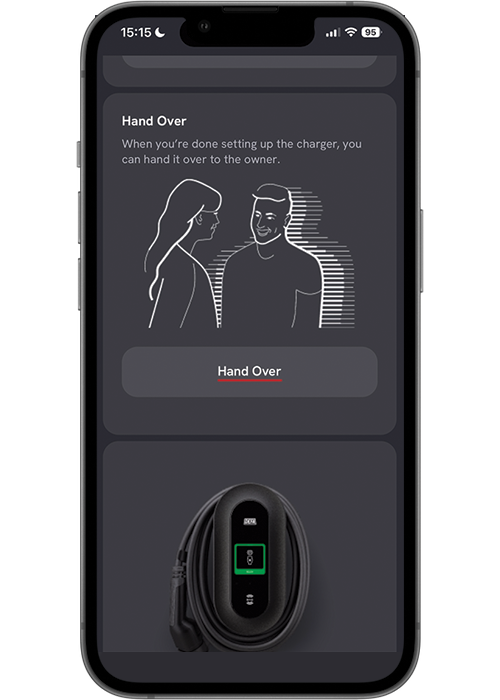
5.1 Handover
Scroll down to «Hand Over»
5
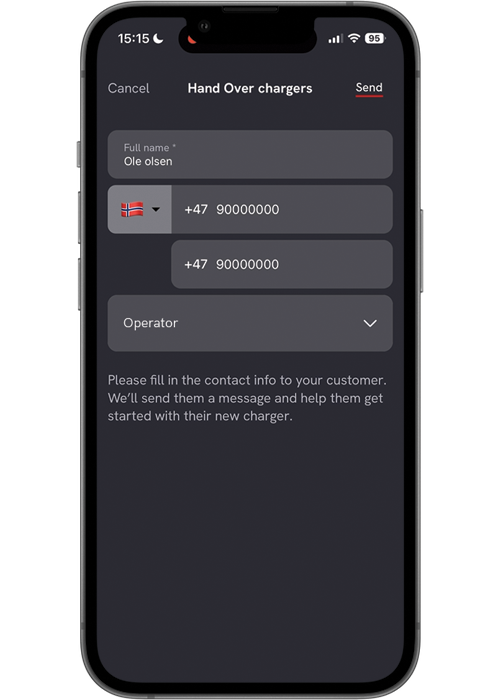
5.2 Handover
Perform «Hand Over chargers» to hand over the installation
Select an Operator from the dropdown menu. Then click «Send» to complete the hand over.
6
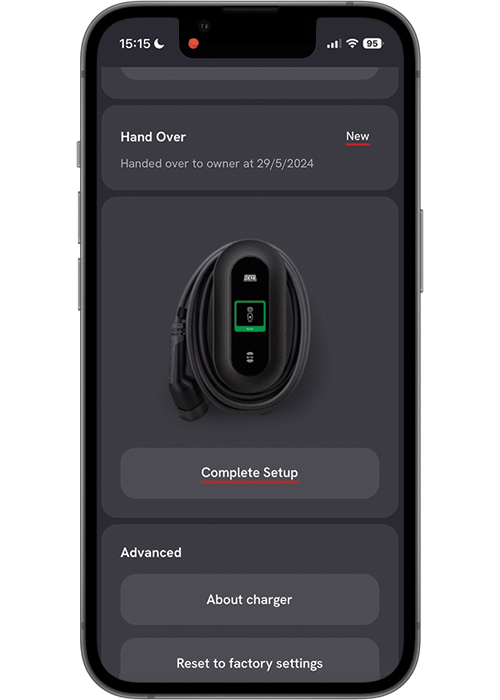
6.1 Complete Setup
Scroll down to «Complete Setup»
6
6.2 Complete Setup
Select «Complete Setup» to end the set up process.

Published: November 12th, 2024

 Lighting